reboot (kernel version is 2.6.32-504.8.1.el6.x86_64)
2.2 Network is configured with Neutron Network
Before following process, make sure that turn off all firewall and then restart
service iptables stop
service iptables start
(OpenStack 설치 시 방화벽 자동 설정해줌. 아니면 compute service가 실행되지 않음)
Disable packet destination filtering
vi /etc/sysctl.conf
net.ipv4.conf.all.rp_filter=0
net.ipv4.conf.default.rp_filter=0
sysctl -p
Install and Neutron Plug-ins on a dedicated compute node
Install Open vSwitch plug-in ------------------------------------------------------------
yum install openstack-neutron-openvswitch
service openvswitch start
chkconfig openvswitch on
ovs-vsctl add-br br-int
vi /etc/neutron/neutron.conf
core-plugin=neutron.plugins.openvswitch.ovs_neutron_plugin.OVSNeutronPluginV2
api_paste_config=/etc/neutron/api-paste.ini
rpc_backend=neutron.openstack.common.rpc.impl_qpid
vi /etc/neutron/plugins/openvswitch/ovs_neutron_plugin.ini
[securitygroup]
firewall_driver=neutron.agent.linux.iptables_firewall.OVSHybridIptablesFirewallDriver
chkconfig neutron-openvswitch-agent on
For GRE tunneling
vi /etc/neutron/plugins/openvswitch/ovs_neutron_plugin.ini
[ovs]
tenant_network_type=gre
tunnel_id_ranges=1:1000
enable_tunneling=True
integration_bridge=br-int
tunnel_bridge=br-tun
local_ip=DATA_INTERNET_IP
For VLANs
vi /etc/neutron/plugins/openvswitch/ovs_neutron_plugin.ini
[ovs]
tenant_network_type = vlan
network_vlan_ranges = physnet1:1:4094
bridge_mappings = physnet1:br-DATA_INTERFACE
Create the bridge for DATA_INTERFACE and add DATA_INTERFACE to it:
ovs-vsctl add-br br-DATA_InTERFACE
ovs-vsctl add-port br-DATA_INTERFACE DATA_INTERFACE
------------------------------------------------------------- Install and Configure Neutron Network
vi /etc/neutron/neutron.conf
auth_host = controller
admin_tenant_name = service
admin_user = neutron
admin_password = NEUTRON_PASS
auth_url = http://controller:35357/v2.0
auth_strategy = keystone
rpc_backend = neutron.openstack.common.rpc.impl_qpid
qpid_hostname = controller
vi /etc/neutron/neutron.conf
vi /etc/nova/nova.conf
network_api_class=nova.network.neutronv2.api.API
neutron_url=http://controller:9696
neutron_auth_strategy=keystone
neutron_admin_tenant_name=service
neutron_admin_username=neutron
neutron_admin_password=NEUTRON_PASS
neutron_admin_auth_url=http://controller:35357/v2.0
linuxnet_interface_driver = nova.network.linux_net.LinuxOVSInterfaceDriver
firewall_driver=nova.virt.firewall.NoopFirewallDriver
security_group_api=neutron
service openstack-nova-compute restart
service neutron-openvswitch-agent restart
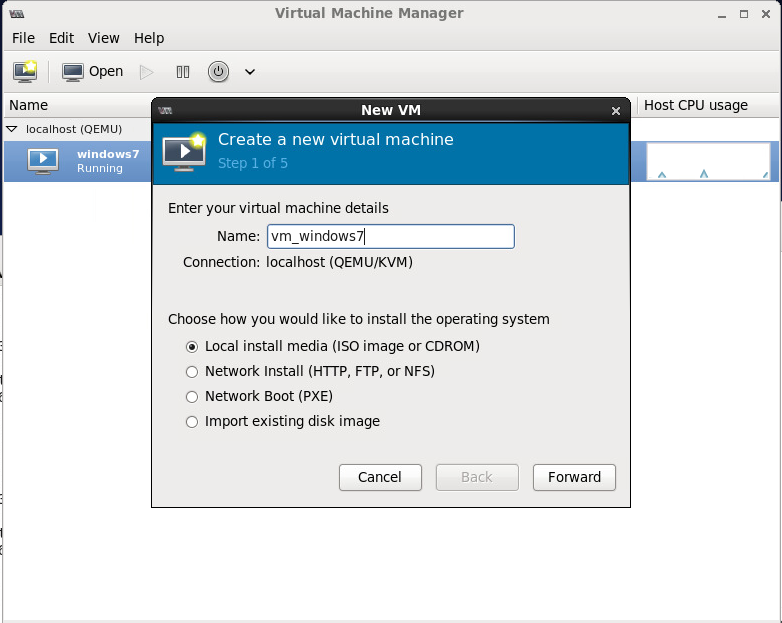
3. Create Windows7 image for OpenStack
virt-manager
New VM -> Name: vm_windows& -> Choose "Local install media(ISO image or CDROM)"
Use ISI image:
/root/openstack-images/X17-24329.iso
OS type:
Windows 7
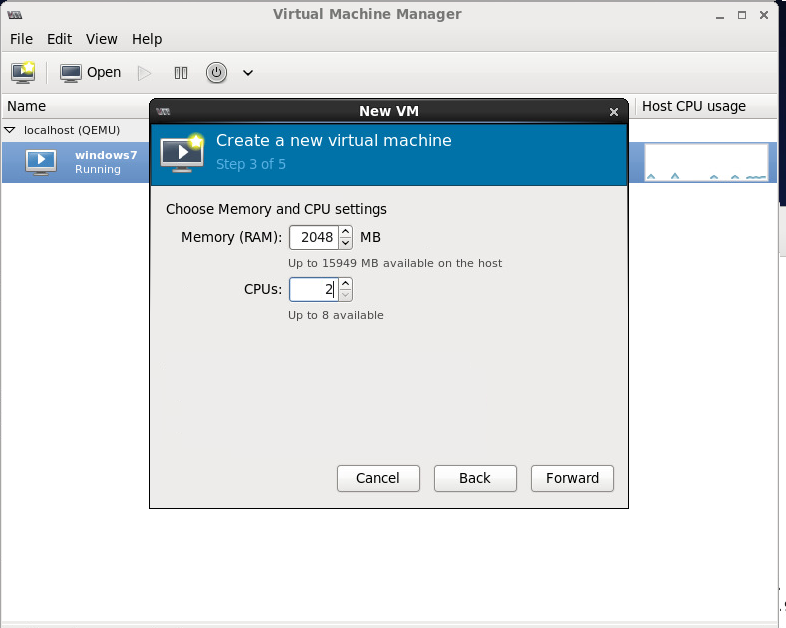
Memory 2048MB
CPUs 2
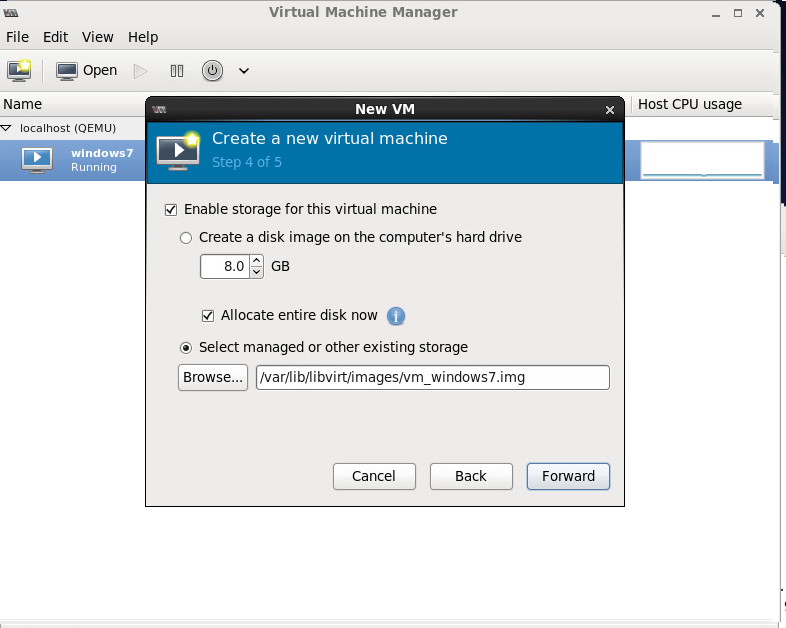
Select managed or other existing storage ( This is for adding virtual CD of installing VirtIO Driver)
New volume Name: vm_windows7.img
Format: qcow2
Max Capacity: 20000MB(20GB)
Allocation: 20000MB(20GB)
Forward
click customize configuration before install (This is for adding new hardware)
Finish
Add Hardware
select managed or other existing storage
Browse: /root/openstack-images/virtio-win-0.1-74.iso
Device type: IDE cdrom
Switch the network and disk to use virtio as shown
Click Begin Installation
Click “Load drivers” and browse to E:\WIN7\AMD64:
Click “OK” and select the “Red Hat VirtIO SCSI controller”. Your 20 GB partition should now appear. Click next, and go grab some coffee while Windows does its thing.
Open the windows device manager.
Right click the ethernet controller and navigate to the drivers in E:\WIN7\AMD64\. It should auto-detect your device after hitting ok.
Repeat this process for the other two broken devices. Finally verify the system can reach the Internet. If everything looks okay, then shutdown the guest OS and open the info panel:
Remove both cdroms, and restart the Windows guest.
Install Cloudbase-init
http://www.cloudbase.it/cloud-init-for-windows-instances/
For now, accept the defaults and continue the install. When everything finishes don’t let the installer run sysprep. Also, before you shutdown, edit the C:\Program Files (x86)\Cloudbase Solutions\Cloudbase-Init\conf and make it look something like this:
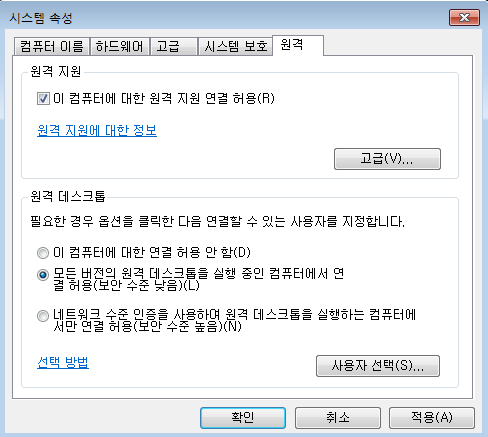
Now disable the Windows firewall:
All the connections to this server will be controlled the security groups in OpenStack. Also, we should allow RDP access:
Now we can shutdown, by manually running sysprep again:
C:\Windows\System32\sysprep\sysprep.exe /generalize /oobe /shutdown 4. Deploy VM on OpenStack
upload image on OpenStack
glance image-create --name="Windows 7 (x86_64)" --is-public=True --container-format=bare --disk-format=qcow2 --file=./win7.qcow2 deploy instance
nava boot --flavor flavor name --image imageID --nicnet-id=netID --availability-zonenova:hostname vmName http://xxx.xx.xx.x/dashbaord/
5. Issue on assigning GPUs to VM which is on OpenStack
Kernel compile to 3.17.2 version and modify kernel options.
See this article: http://heavenkong.blogspot.kr/2015/01/gpu-pass-through-on-kvm-with-windows-7.html
 QQ群⑧:
QQ群⑧:


 窥视卡
窥视卡 雷达卡
雷达卡 发表于 2017-6-27 08:49:38


 提升卡
提升卡 置顶卡
置顶卡 沉默卡
沉默卡 喧嚣卡
喧嚣卡 变色卡
变色卡 千斤顶
千斤顶 显身卡
显身卡