|
|
ELK+Filebeat+Nginx集中式日志解决方案(二)——添加ElasticSearch集群
一、使用说明:
Elasticsearch插件:
Elasticsearch常用的几个插件为:
因为依照第一篇文章,笔者是用的elasticsearch-5.2.2安装的,版本比较新,所以安装方法也不一样,下面会以elasticsearch-head为例,构建与elasticsearch的交互。
Elasticsearch 集群: Elasticsearch 启动时会根据配置文件中设置的集群名字(cluster.name)自动查找并加入集群。Elasctisearch 节点默认使用 9300 端口寻找集群,所以必须开启这个端口。
一个 Elasticsearch 集群中一般拥有三种角色的节点,master、data 和 client。
- master:master 节点负责一些轻量级的集群操作,比如创建、删除数据索引、跟踪记录集群中节点的状态、决定数据分片(shards)在 data 节点之间的分布;
- data:data 节点上保存了数据分片。它负责数据相关操作,比如分片的 CRUD,以及搜索和整合操作。这些操作都比较消耗 CPU、内存和 I/O 资源;
- client:client 节点起到路由请求的作用,实际上可以看做负载均衡器。
配置文件中有两个与集群相关的配置:
- node.master:默认 true。True 表示该节点是 master 节点;
- node.data:默认 true。True 表示该节点时 data 节点。如果两个值都为 false,表示是 client 节点。
一个集群中不一定有 client 节点,但是肯定有 master 和 data 节点。默认第一个启动的节点是 master。Master 节点也能起到路由请求和搜索结果整合的作用,所以在小规模的集群中,无需 client 节点。但是如果集群规模很大,则有必要设置专门的 client。
二、实验环境
架构图:

6台服务器(centos 6.5 final版本):
1
2
3
4
5
6
| 192.168.1.194 (filebeat收集日志,nginx做为web服务器)
192.168.1.195 (filebeat收集日志,nginx做为web服务器)
192.168.1.196 (logstash)
192.168.1.198(elasticsearch master,kibana,nginx做方向代理)
192.168.1.200 (elasticsearch DataNode)
192.168.1.201 (elasticsearch DataNode)
|
使用版本:
1
2
3
4
5
6
| java-1.8.0-openjdk
filebeat-5.2.2
logstash-5.2.2
elasticsearch-5.2.2
kibana-5.2.2
nginx-1.6.1
|
三、安装配置:
此次实验是在第一篇文章的基础上,不熟悉的可以先看一下第一篇文章《ELK+Filebeat+Nginx集中式日志解决方案(一)》。
安装插件:
先在192.168.1.198上安装elasticsearch-head插件,对于Elasticsearch 5.x不在支持head插件模式,只能已独立服务模式启动,具体方式如下:
1
2
3
4
5
6
7
| cd /usr/local/
yum install -y git npm
git clone git://github.com/mobz/elasticsearch-head.git
cd elasticsearch-head
npm install
npm install -g grunt-cli
nohup grunt server &
|
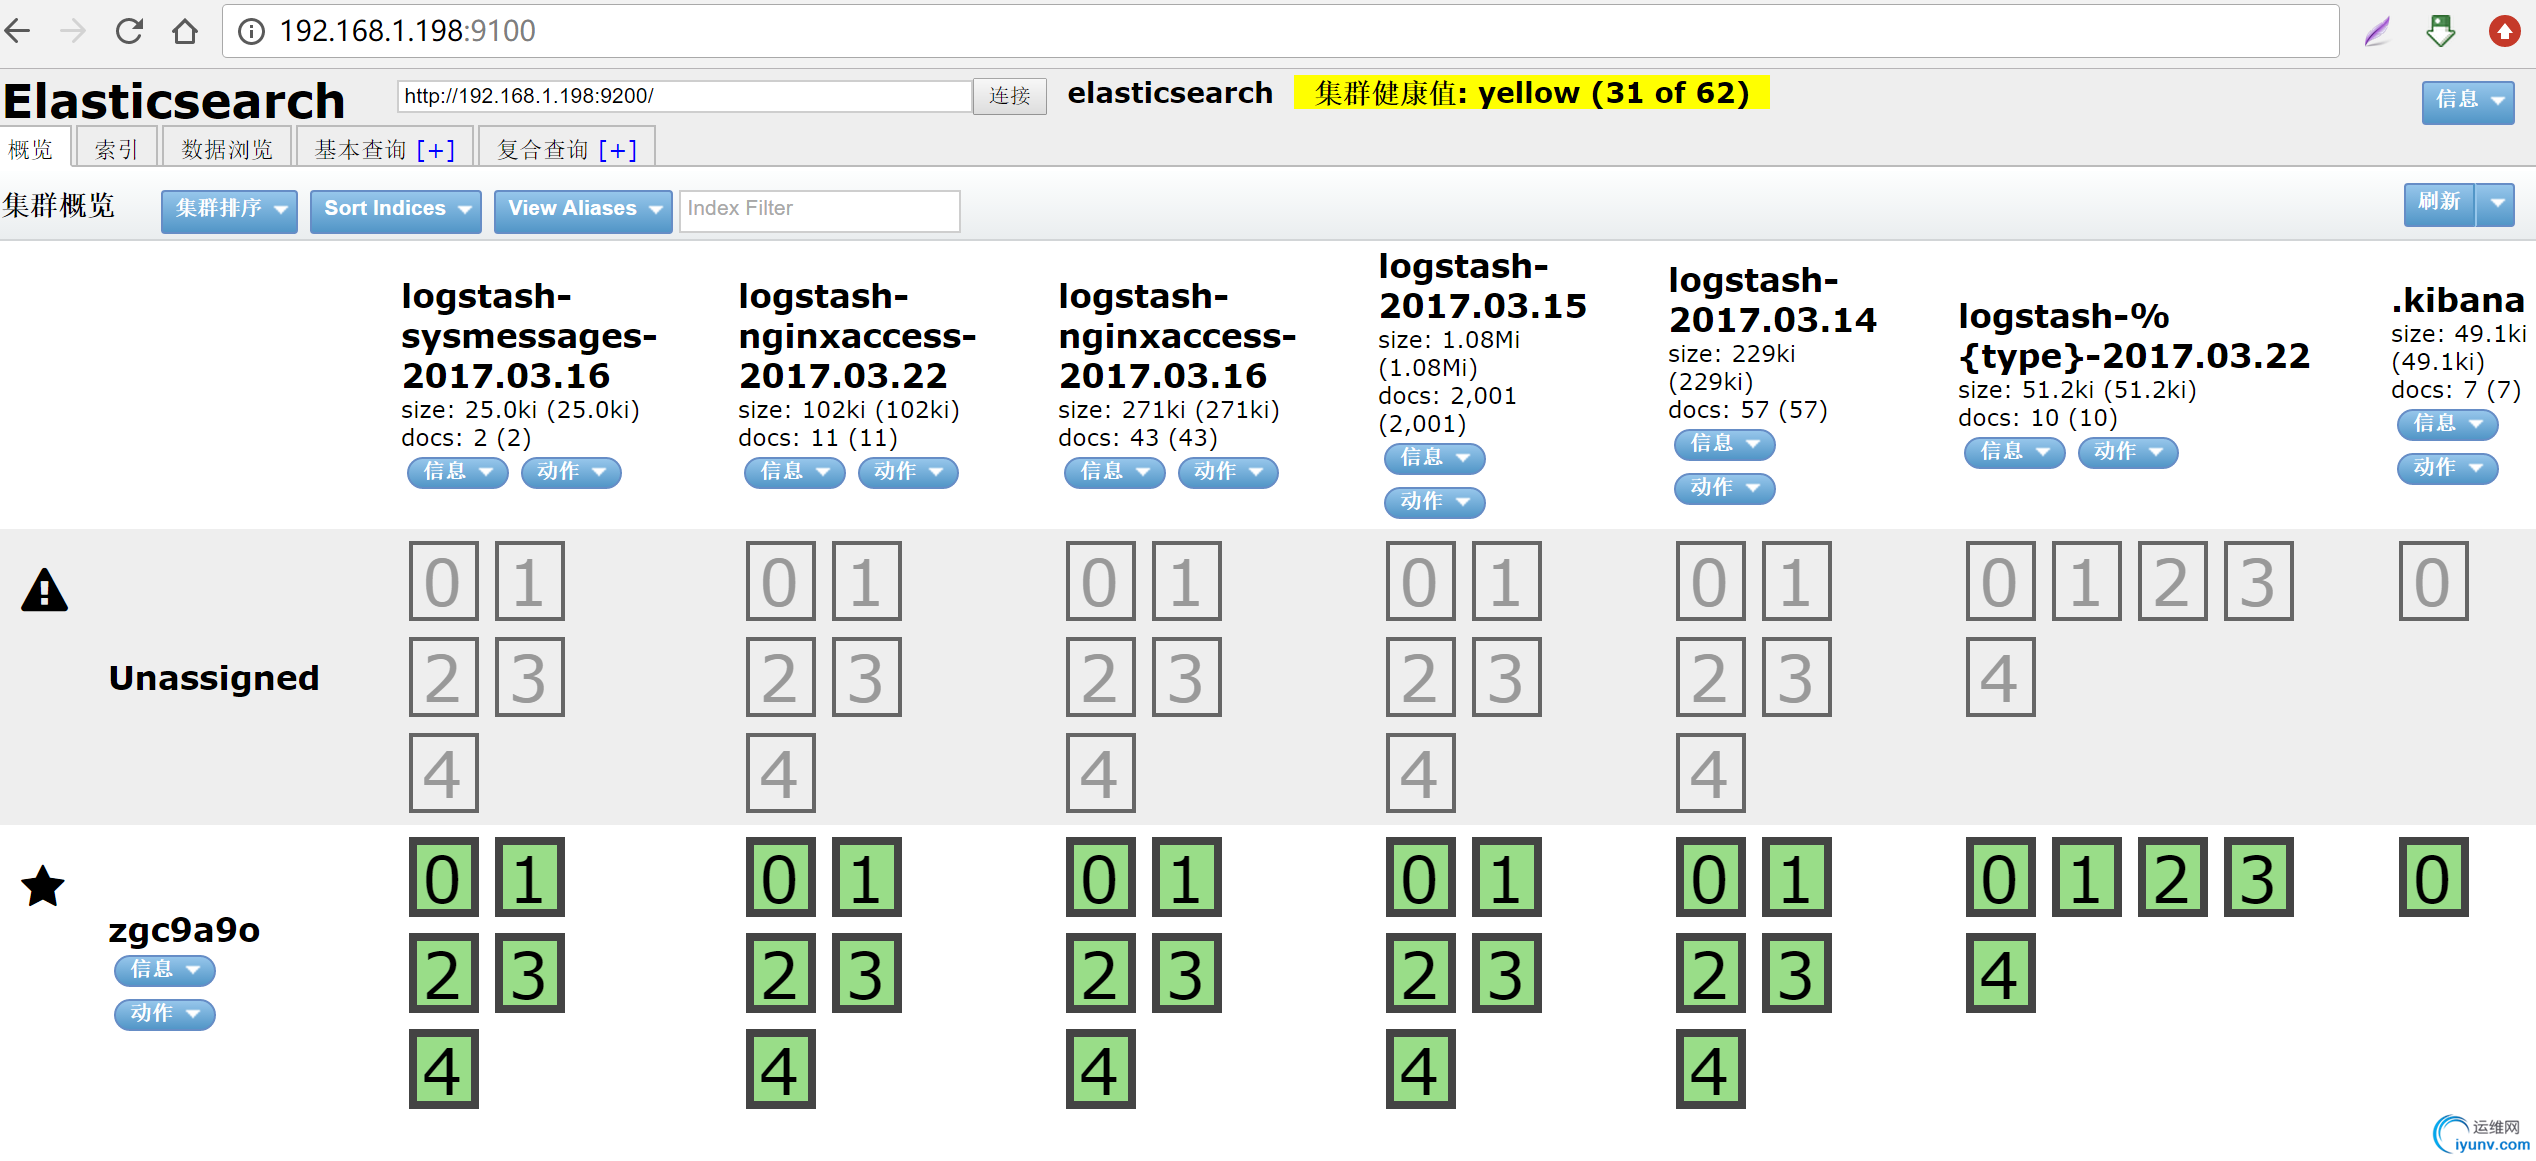
通过浏览器访问http://192.168.1.198:9100/可以访问elasticsearch-head服务。可以看到head提供的页面,但是连接不上elasticsearch.需要在elasticsearch5.2.2的配置里增加一下参数:
1
2
| http.cors.enabled: true
http.cors.allow-origin: "*"
|
重启elasticsearch后,刷新elasticsearch-head的页面(http://192.168.1.198:9100/),发现链接正常了。界面如下:

ok,至此安装elasticsearch-head插件结束。
安装集群:
先在192.168.1.200和192.168.1.201上安装好elasticsearch环境,可以参照《ELK+Filebeat+Nginx集中式日志解决方案(一)》。
在192.168.1.198(master)上面配置elasticsearch.yml
1
2
3
4
5
6
7
8
9
10
11
12
13
14
15
16
17
18
19
20
21
22
23
24
25
26
27
28
29
30
31
32
33
34
35
36
37
| #---------------------------------- Cluster -----------------------------------
# Use a descriptive name for your cluster:
cluster.name: myesdata
# ------------------------------------ Node ------------------------------------
node.name: server198
node.master: true
node.data: false
# ----------------------------------- Paths ------------------------------------
path.data: /home/data/elk
path.logs: /var/log/elasticsearch/elasticsearchlog
# ----------------------------------- Memory -----------------------------------
#bootstrap.mlockall: true
indices.fielddata.cache.size: 50mb
#------------------------------------ Network And HTTP --------------------------
network.host: 0.0.0.0
http.port: 9200
# --------------------------------- Discovery ------------------------------------
discovery.zen.minimum_master_nodes: 1
discovery.zen.ping_timeout: 200s
discovery.zen.fd.ping_timeout: 200s
discovery.zen.fd.ping_interval: 30s
discovery.zen.fd.ping_retries: 6
discovery.zen.ping.unicast.hosts: ["192.168.1.198:9300","192.168.1.200:9300","192.168.1.201:9300",]
# --------------------------------- merge ------------------------------------------
indices.store.throttle.max_bytes_per_sec: 100mb
bootstrap.system_call_filter: false
http.cors.enabled: true
http.cors.allow-origin: "*"
|
在192.168.1.200(DataNode)上面配置elasticsearch.yml
1
2
3
4
5
6
7
8
9
10
11
12
13
14
15
16
17
18
19
20
21
22
23
24
25
26
27
28
29
30
31
32
33
34
35
36
37
38
39
| #---------------------------------- Cluster -----------------------------------
# Use a descriptive name for your cluster:
cluster.name: myesdata
# ------------------------------------ Node ------------------------------------
node.name: server200
node.master: false
node.data: true
# ----------------------------------- Paths ------------------------------------
path.data: /home/data/elk
path.logs: /var/log/elasticsearch/elasticsearchlog
# ----------------------------------- Memory -----------------------------------
#bootstrap.mlockall: true
indices.fielddata.cache.size: 50mb
#------------------------------------ Network And HTTP --------------------------
network.host: 0.0.0.0
http.port: 9200
# ------------------------------------ Translog ----------------------------------
#index.translog.flush_threshold_ops: 50000
# --------------------------------- Discovery ------------------------------------
discovery.zen.minimum_master_nodes: 1
discovery.zen.ping_timeout: 200s
discovery.zen.fd.ping_timeout: 200s
discovery.zen.fd.ping_interval: 30s
discovery.zen.fd.ping_retries: 6
discovery.zen.ping.unicast.hosts: ["192.168.1.198:9300",]
#discovery.zen.ping.multicast.enabled: false
# --------------------------------- merge ------------------------------------------
indices.store.throttle.max_bytes_per_sec: 100mb
bootstrap.system_call_filter: false
|
在192.168.1.201(DataNode)上面配置elasticsearch.yml
1
2
3
4
5
6
7
8
9
10
11
12
13
14
15
16
17
18
19
20
21
22
23
24
25
26
27
28
29
30
31
32
33
34
35
36
37
38
39
| #---------------------------------- Cluster -----------------------------------
# Use a descriptive name for your cluster:
cluster.name: myesdata
# ------------------------------------ Node ------------------------------------
node.name: server201
node.master: false
node.data: true
# ----------------------------------- Paths ------------------------------------
path.data: /home/data/elk
path.logs: /var/log/elasticsearch/elasticsearchlog
# ----------------------------------- Memory -----------------------------------
#bootstrap.mlockall: true
indices.fielddata.cache.size: 50mb
#------------------------------------ Network And HTTP --------------------------
network.host: 0.0.0.0
http.port: 9200
# ------------------------------------ Translog ----------------------------------
#index.translog.flush_threshold_ops: 50000
# --------------------------------- Discovery ------------------------------------
discovery.zen.minimum_master_nodes: 1
discovery.zen.ping_timeout: 200s
discovery.zen.fd.ping_timeout: 200s
discovery.zen.fd.ping_interval: 30s
discovery.zen.fd.ping_retries: 6
discovery.zen.ping.unicast.hosts: ["192.168.1.198:9300",]
#discovery.zen.ping.multicast.enabled: false
# --------------------------------- merge ------------------------------------------
indices.store.throttle.max_bytes_per_sec: 100mb
bootstrap.system_call_filter: false
|
在192.168.1.198,192.168.1.200,192.168.1.201上面分别执行
1
2
3
4
| mkdir -p /home/data/elk/
mkdir -p /var/log/elasticsearch/elasticsearchlog/
chown elasticsearch. -R /home/data/elk/
chown elasticsearch. -R /var/log/elasticsearch/elasticsearchlog/
|
然后先启动master,在分别启动DataNode
1
| service elasticsearch start
|
浏览器访问http://192.168.1.198:9100/ ,查看集群是否正常:

ok,elasticsearch集群到这里就配置成功了,接下来需要做的就是修改logstash的配置:
1
2
3
4
5
6
7
8
| output {
elasticsearch {
hosts => ["192.168.1.200:9200","192.168.1.201:9200"]
index => "logstash-%{type}-%{+YYYY.MM.dd}"
document_type => "%{type}"
}
#stdout { codec => rubydebug }
}
|
只需要把原来的
1
| hosts => ["192.168.1.198:9200"]
|
这里改成
1
| hosts => ["192.168.1.200:9200","192.168.1.201:9200"]
|
输出到elasticsearch集群的两个DataNode节点就ok了
然后启动logstash:
1
| nohup logstash -r -f /etc/logstash/conf.d/nginx-test.conf --path.settings /etc/logstash &
|
加上-r选项比较好,可以自动观测logstash配置文件的变化,自动重载配置。
然后此时查看kibana就会有数据输出了。
然后浏览器再访问http://192.168.1.198:9100/ ,查看一下状态:

会发现状态跟之前没数据时不一样了。
ok,到这里elasticsearch集群就加上去了。欢迎关注后续文章......
|
|