|
|
题记:linux内核移植的文章网上很多,而且有的还写的非常好。本篇不期望起到多大的作用,只是梳理一下自己移植的步骤,适当加入自己的点滴理解,方便日后查阅。如有错误,欢迎指正!
友情提示:
1.按照正常步骤移植linux-2.6.32.7内核会出现下面的错误:
kernel/time/clocksource.c: In function 'clocksource_register':
kernel/time/clocksource.c:556: error: implicit declaration of function 'clocksource_max_deferment'。
所以,在下好内核源码包后,需要先给它打内核补丁,或者在kernel/time/clocksource.c文件中添加如下代码,其中行首有‘+’号的为添加的代码。
#else /* CONFIG_GENERIC_TIME */
+static inline u64 clocksource_max_deferment(struct clocksource *cs)
+{
+ return 0;
+}
+
static inline void clocksource_select(void) { }
#endif
请参考:http://patchwork.kernel.org/patch/75896/
2.如果开发板的Nand flash是128M容量的,则必须使用针对128M容量的制作根文件系统映像的工具,本人使用的是开发板自带的mkyaffs2image-128M
3.由于mkyaffs2image-128M是在Fedora 9.0平台下编译的,所以,如果在其他平台下使用该工具可能会出现“浮点数例外”的错误导致不能使用,因此,最好使用Fedora9.0作为主机操作系统。
4.这里再向大家推荐一本好书,韦东山的《嵌入式Linux应用开发完全手册》
5.本人的移植步骤差不多是照搬下面几篇文章的:
1. http://blog.iyunv.com/baozhongchao/archive/2009/08/31/4504218.aspx
2.http://www.ourdev.cn/bbs/bbs_content.jsp?bbs_sn=3293771&bbs_page_no=2&bbs_id=9999
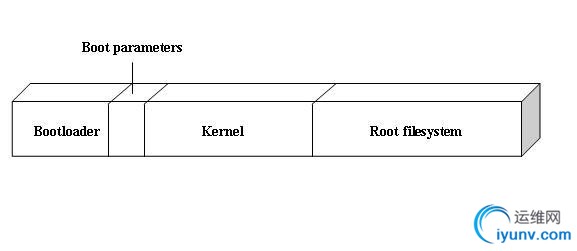
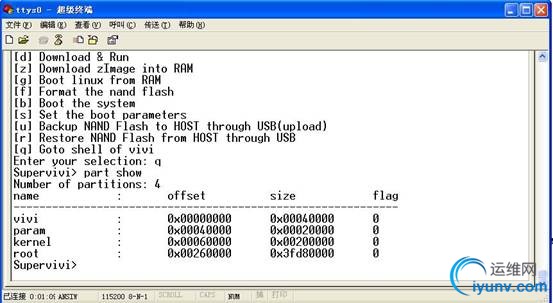
6.移植之前需要看一下NAND FLASH的分区结构

7.烧写到NAND FLASH前最好先擦除一遍
制作 ARM版linux
一、修改顶层Makefile,确定内核要移植到的目标架构及使用的交叉编译器。
ARCH ?= arm
CROSS_COMPILE ?= arm-linux-
二、修改平台的输入时钟频率为12M。
arch/arm/mach-s3c2440/mach-smdk2440.c文件,在函数 static void __init smdk2440_map_io(void)中,修改成s3c24xx_init_clocks(12000000)。
三、修改Nand flash分区信息,使其与bootloader对Flash的分区设置保持一致(不一致也没关系)

但我们在这里看到,存放根文件系统的分区的大小为0x3fd80000,加上他的偏移正好是1G,而我的NAND FLASH只有128M
故需要重新计算:128*1024*1024-0x00260000=0x07da0000
arch/arm/plat-s3c24xx/common-smdk.c文件
static struct mtd_partition smdk_default_nand_part[] =
{
[0] = {
.name = "supervivi",
.offset = 0x00000000,
.size = 0x00040000,
},
[1] = {
.name = "kernel",
.offset = 0x00060000,
.size = 0x00200000,
},
[2] = {
.name = "root",
.offset = 0x00260000,
.size = 0x07da0000,
}
};
四、修改mach_type。Bootloader传递的mach_type需要与内核中的某个mach_type匹配
方法一:修改bootloader传递给内核的启动参数
方法二:arch/arm/tools/mach-types文件中,
s3c2440 ARCH_S3C2440 S3C2440 362
修改为:
s3c2440 ARCH_S3C2440 S3C2440 1999
其中1999为supervivi默认的mach_type,也是mini2440的mach_type,发生冲突,但只要不加入mini2440的配置就不会出问题
五、添加对yaffs2文件系统的支持
cd /work/yaffs2
./patch-ker.sh c /work/linux-2.6.32.7
六、配置内核,主要是添加对s3c2440、yaffs2文件系统的支持
make s3c2410_defconfig
make menuconfig
1.System Type---> S3C2410 Machines--->
SMDK2410/A9M2410选上 其余不选 S3C2440 Machines--->
SMDK2440
SMDK2440 with S3C2440 CPU module,其余不选 其余的Machines下选项全部不选(如2400,2412,2442,2443)
2.Kernel Features--->
Use the ARM EABI to compile the kernel
3.Filesystem---> Miscellaneous filesystems---> YAFFS2 file system support
Lets Yaffs do its own ECC
七、编译内核
make clean (己经编译过,则要执行这句)
make zImage
编译结束得到arch/arm/boot/zImage文件
制作根文件系统
一、建立bin、linuxrc、sbin、usr目录
通过安装Busybox来建立这些目录
(1)修改Busybox根目录下的Makefile
ARCH ?= arm
CROSS_COMPILE ?= arm-linux-
(2)执行“make menuconfig”后退出
(3)执行“make”编译Busybox
(4)执行“make CONFIG_PREFIX=/work/rootfs install”,将Busybox安装在rootfs目录下
此时在rootfs目录下建立了bin、linuxrc、sbin、usr目录
二、建立lib目录(程序运行所需要的动态链接库的目录)
mkdir /work/rootfs/lib
cp -rfd /work/root_qtopia/lib/* /work/rootfs/lib/
此时在rootfs目录下建立了lib目录
三、建立etc目录
mkdir rootfs/etc
(1)建立etc/inittab
gedit etc/inittab,内容为:
# /etc/inittab ::sysinit:/etc/init.d/rcS s3c2410_serial0::askfirst:-/bin/sh ::ctrlaltdel:/sbin/reboot ::shutdown:/bin/umount -a –r
(2)建立etc/init.d/rcS
mkdir init.d
gedit rcS,内容为:
#!/bin/sh ifconfig eth0 192.168.1.17 mount -a mkdir /dev/pts mount -t devpts devpts /dev/pts echo /sbin/mdev > /proc/sys/kernel/hotplug mdev -s
另外,还要改变它的属性使它能够执行。 chmod +x etc/init.d/rcS
(3)建立etc/fstab文件
gedit fstab,内容为:
#device mount-point type options dump fack order proc /proc proc defaults 0 0 tmpfs /tmp tmpfs defaults 0 0 sysfs /sys sysfs defaults 0 0 tmpfs /dev tmpfs defaults 0 0
(4)构建其他必要的目录,但它们可以是空的
mkdir proc mnt tmp sys root
(5)另外,mdev(udev的简化版)是通过init进程来启动的,在使用mdev构造/dev目录之前,init进程至少要用到设备文件/dev/console、/dev/null,所以必须先建立这两个设备文件:
mkdir rootfs/dev
# mknod -m 660 dev/console c 5 1 # mknod -m 660 dev/null c 1 3
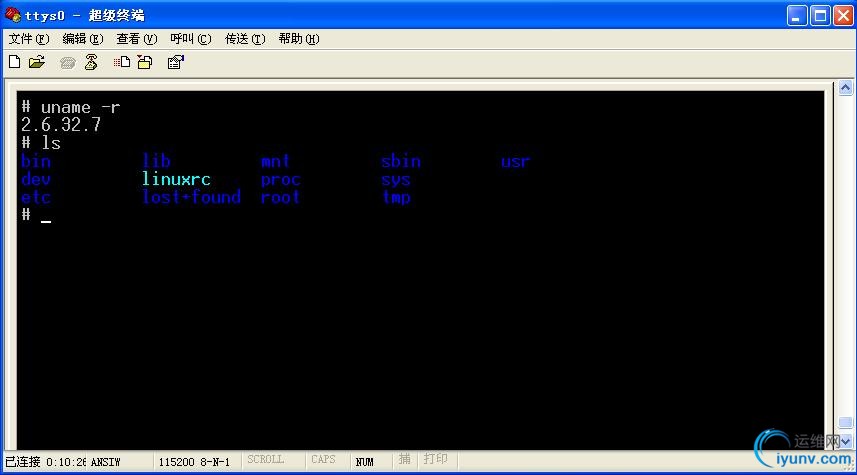
至此,生成的目录和文件为:bin、linuxrc、sbin、usr、lib、etc、proc、mnt、tmp、sys、root
此时的rootfs就是一个非常小的根文件系统。开发板可以将它作为网络根文件系统直接启动,或者制作成文件系统映像文件存储到Flash中。
mkyaffs2image-128M rootfs root.img

|
|
|